AWS DevOps Project - 2
Understanding code-Deploy and code-Pipeline in AWS


Please refer to my previous blog, or else you can't match the flow of the project :)
Here is the link-->Blog
As we are done with CodeCommit and CodeBuild, Let's further continue with CodeDeploy and CodePipeline.
1) CODE DEPLOY
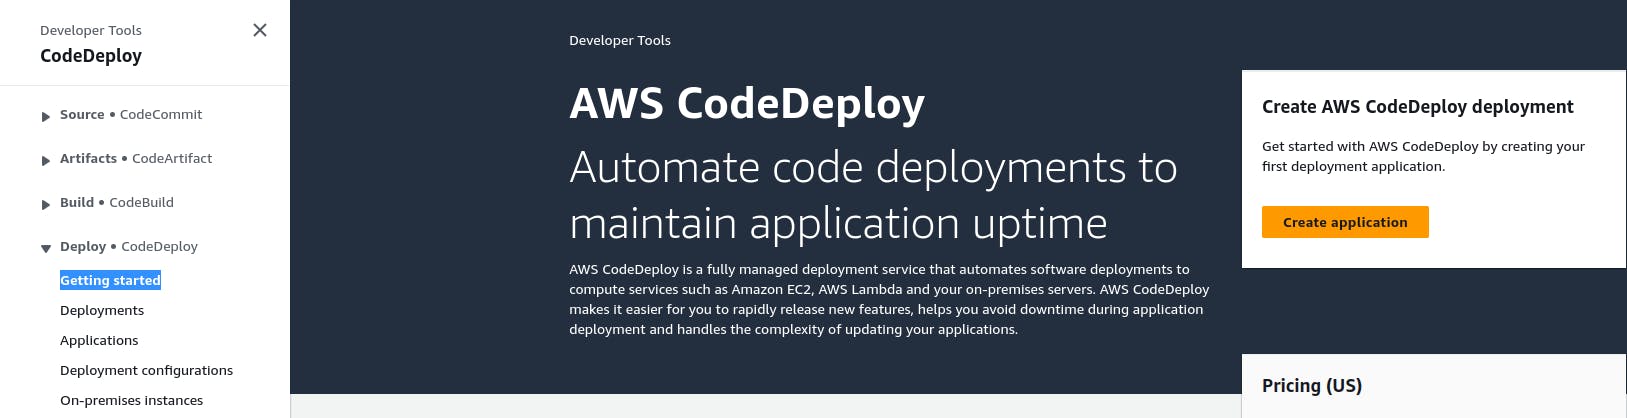
Step 1: Log in with your AWS Credentials-->Search for Developers Tool-->Click CodeDeploy

Step 2: Click on Getting started--> Click Create application
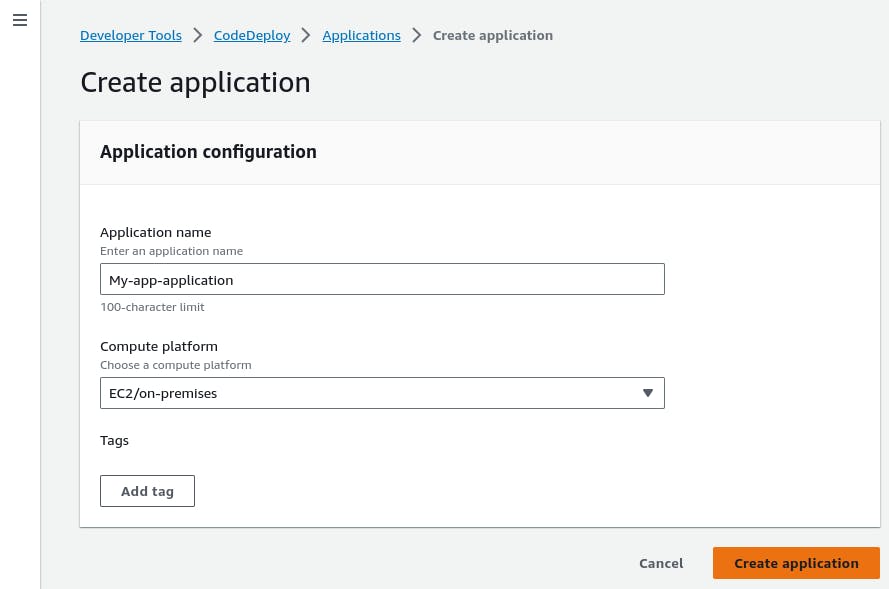
Step 3: Fill in the details--> Click Create application
Step 4: The application is created. Now click on Create Deployment group
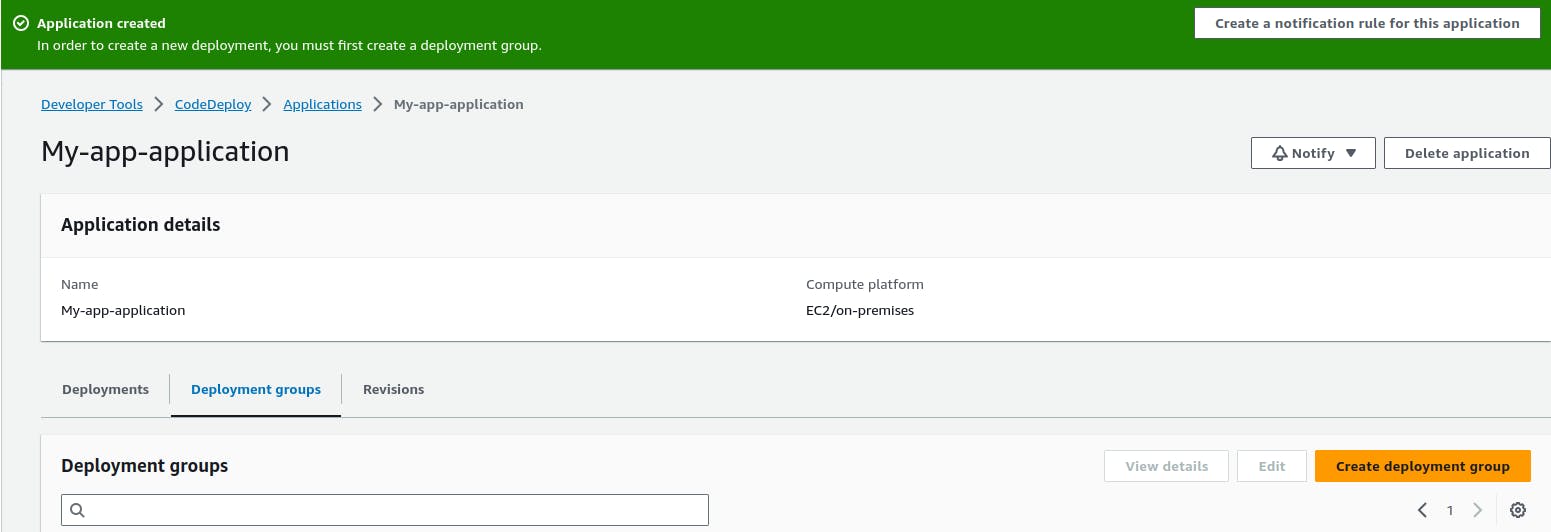
Step 5: Once You click, you will get to see something like this...
Enter the Group Name...
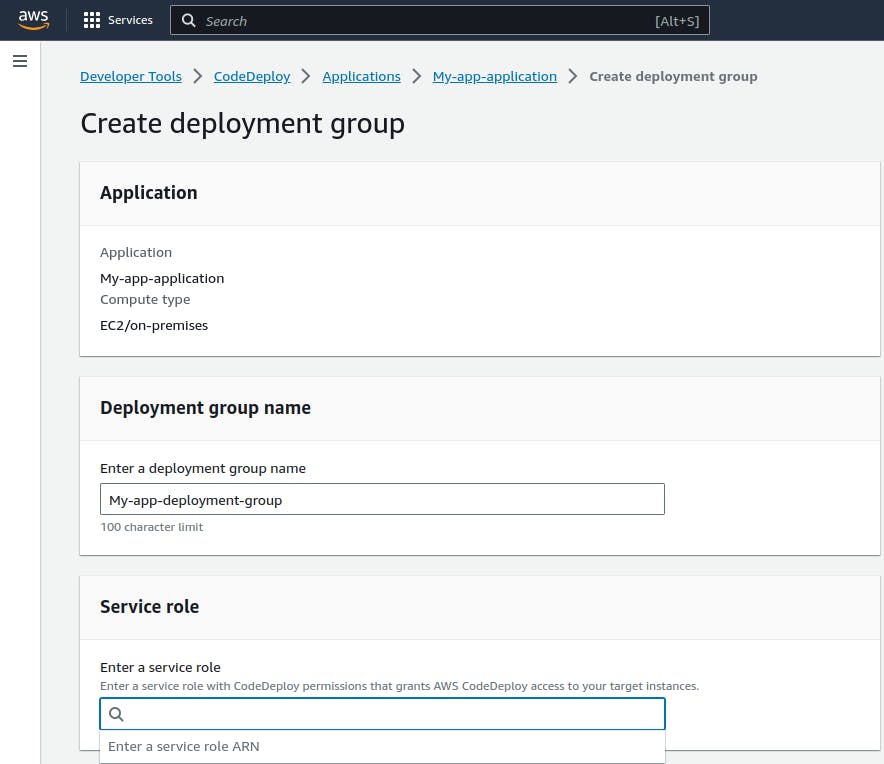
In the service role, we don't have anything to select, this requires IAM.
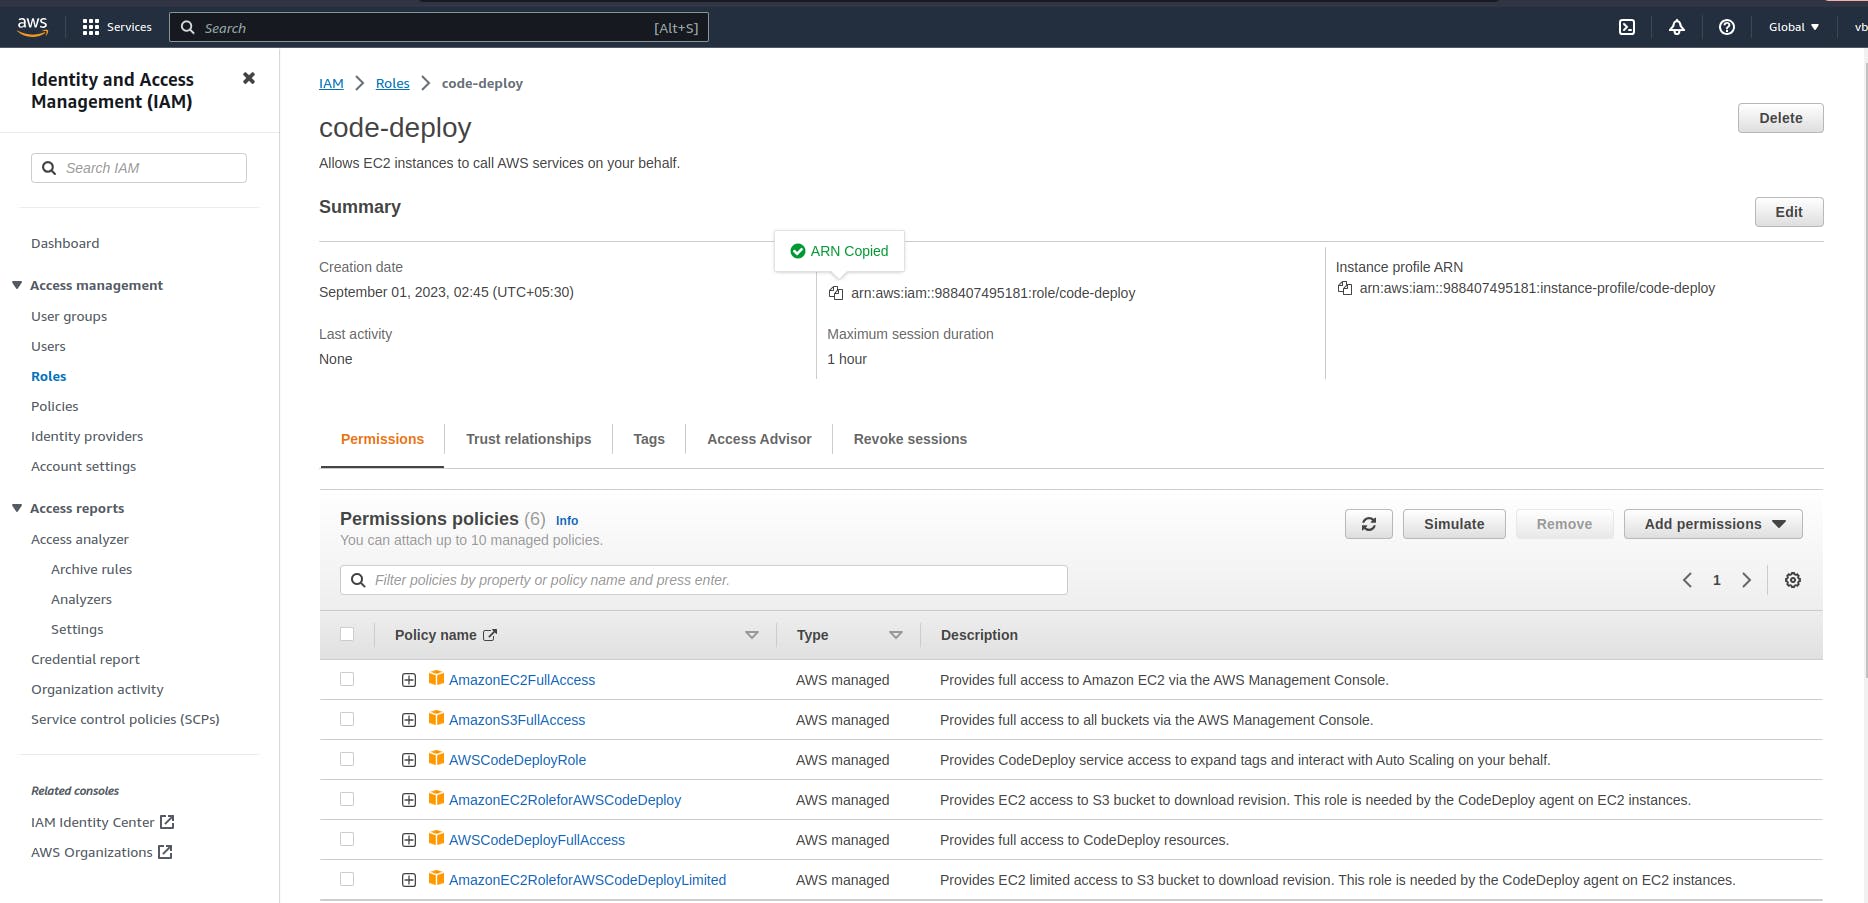
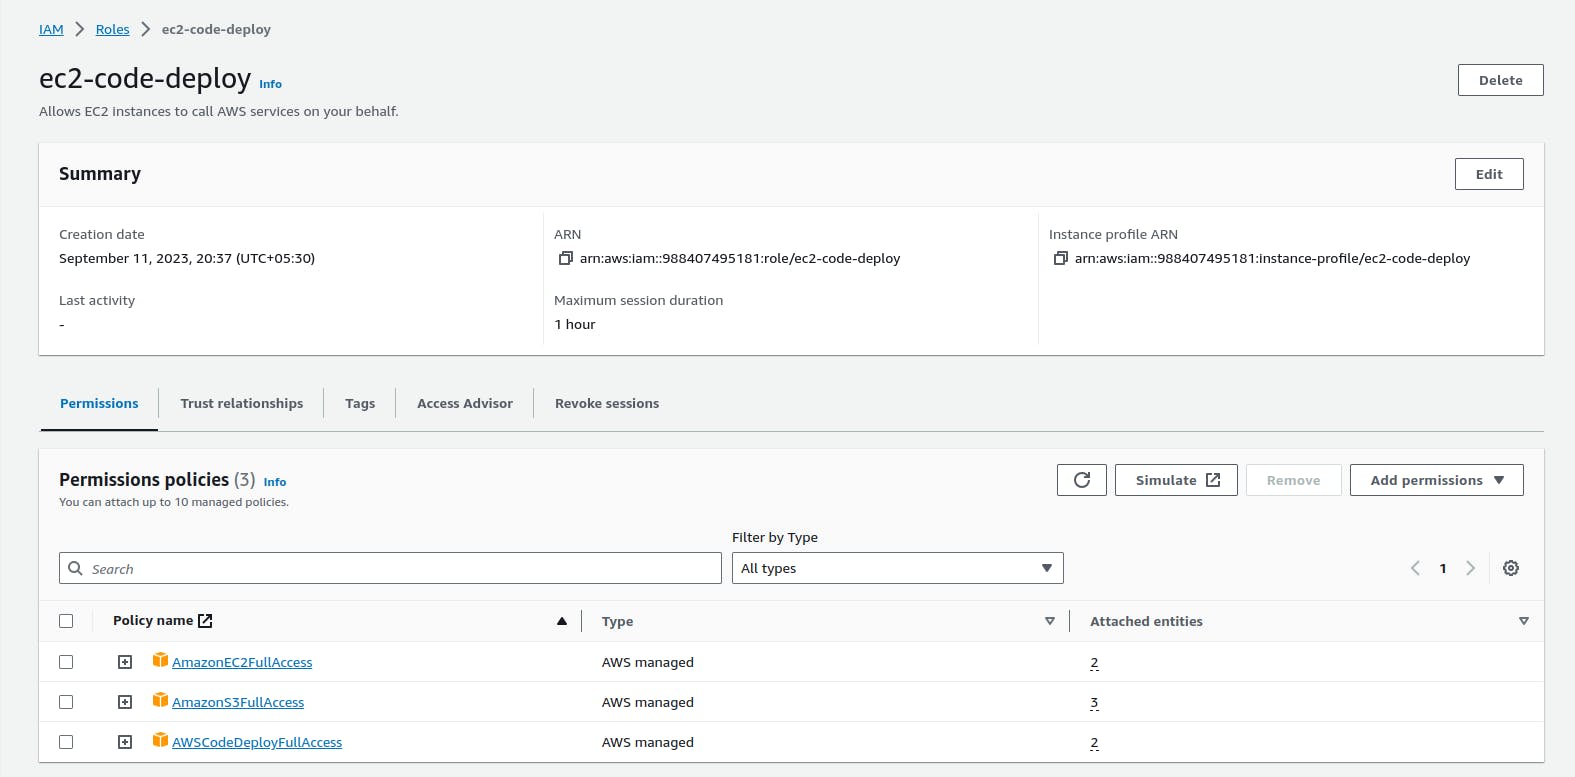
Step 6: Search for IAM-->click on Roles-->create role-->click add permissions, as shown below-->copy the ARN is shown in the Summary section.
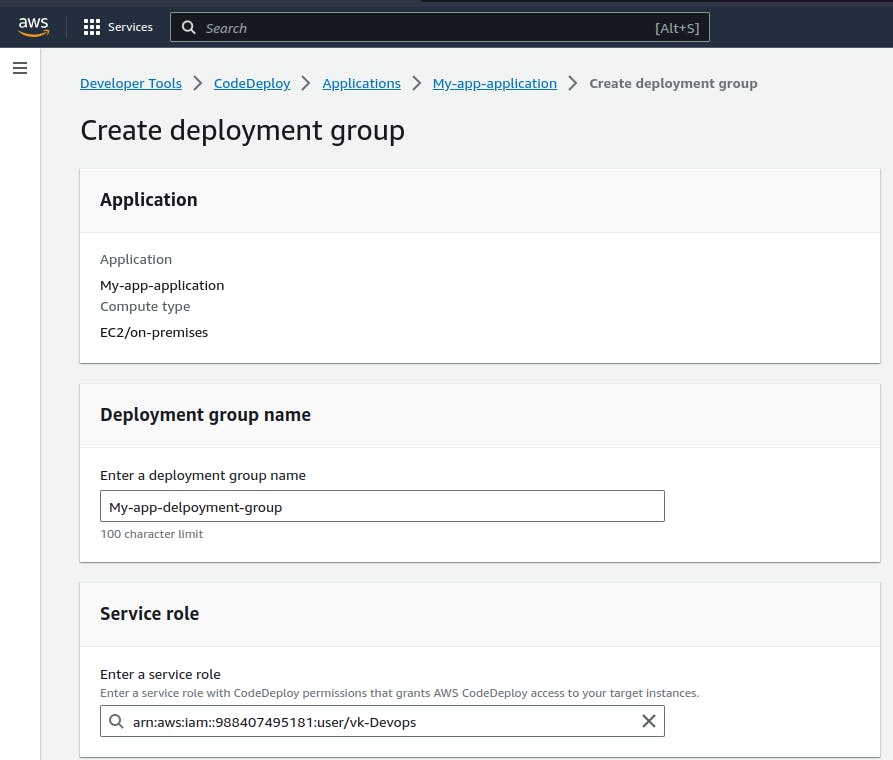
Step 7: Paste the copied ARN in the Service role section.
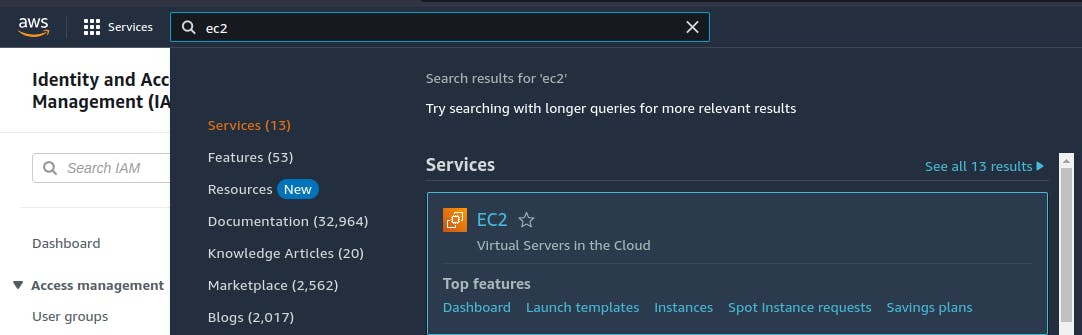
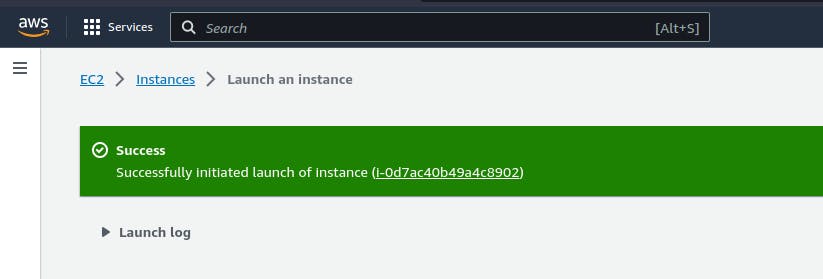
Step 8: Search for EC2 and launch an instance.
Step 9: Now come back to the deployment page, and register the created instance as shown below...

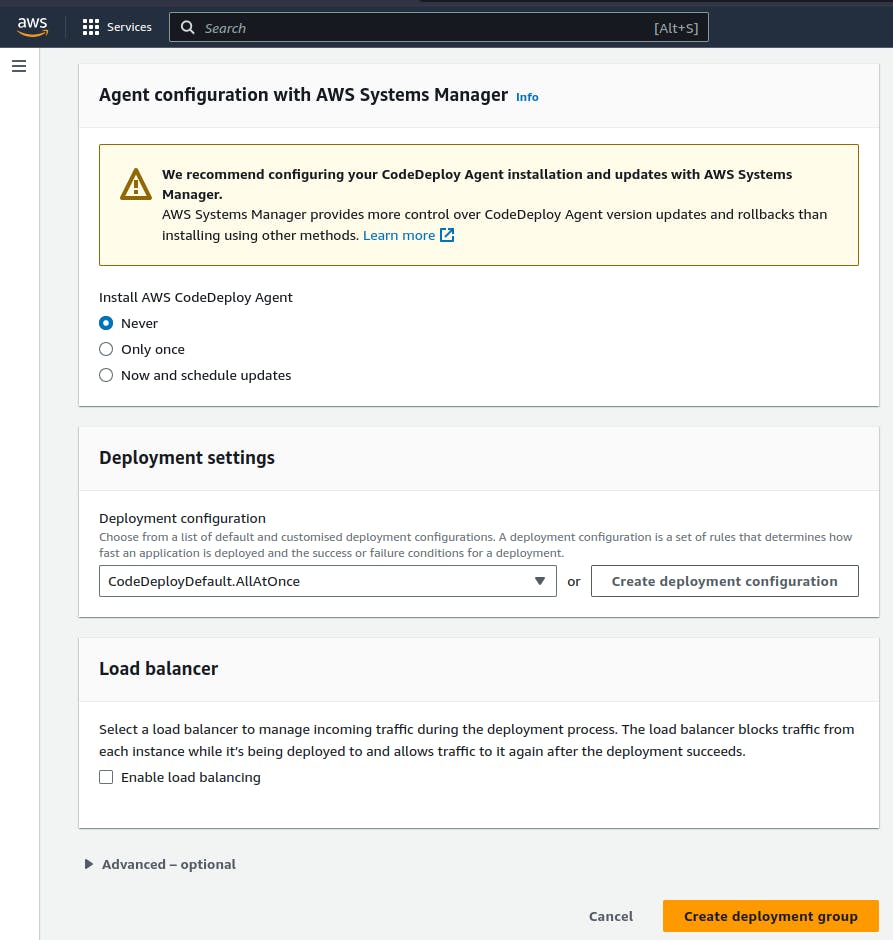
Step 10: In the Agent configuration section-->select Never-->click on create deployment group.
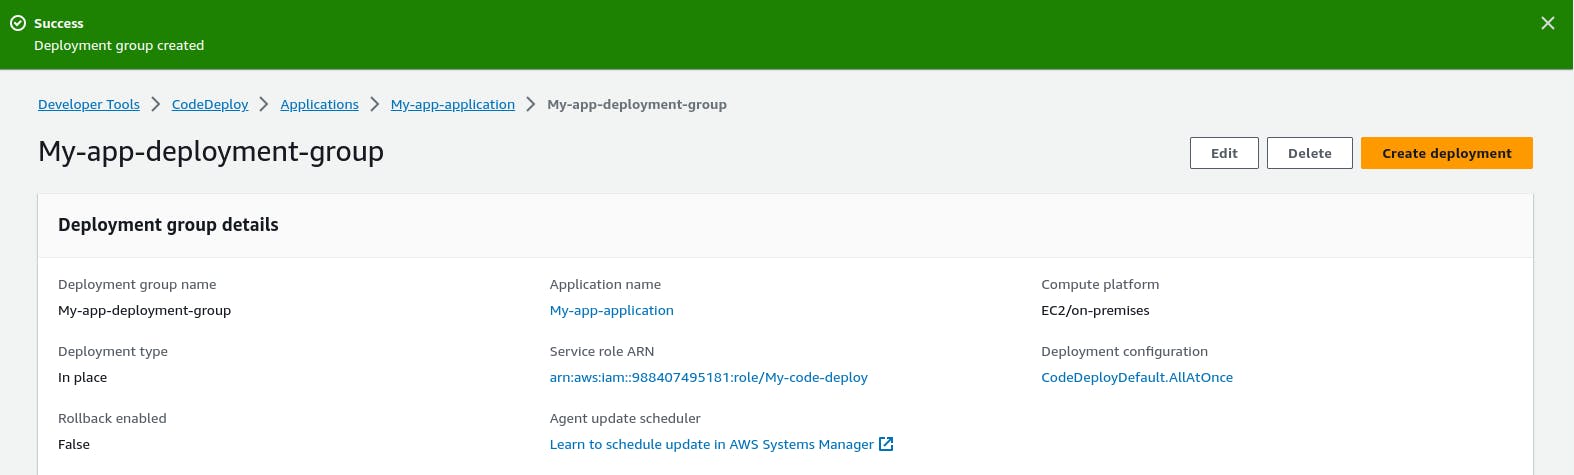
Our Deployment is created within 10 steps 🥳🥳
1.1) Setting up the agent for CodeDeploy
Now Connect your EC2 instance and run the following code.
Step 1: Create a file.
vim install.sh
Step 2: Paste the below code-->(ESC:wq)-->Click Enter.
#!/bin/bash
# This installs the CodeDeploy agent and its prerequisites on Ubuntu 22.04.
sudo apt-get update
sudo apt-get install ruby-full ruby-webrick wget -y
cd /tmp
wget https://aws-codedeploy-us-east-1.s3.us-east-1.amazonaws.com/releases/codedeploy-agent_1.3.2-1902_all.deb
mkdir codedeploy-agent_1.3.2-1902_ubuntu22
dpkg-deb -R codedeploy-agent_1.3.2-1902_all.deb codedeploy-agent_1.3.2-1902_ubuntu22
sed 's/Depends:.*/Depends:ruby3.0/' -i ./codedeploy-agent_1.3.2-1902_ubuntu22/DEBIAN/control
dpkg-deb -b codedeploy-agent_1.3.2-1902_ubuntu22/
sudo dpkg -i codedeploy-agent_1.3.2-1902_ubuntu22.deb
systemctl list-units --type=service | grep codedeploy
sudo service codedeploy-agent status
Step 3: Running a bash install.sh, file typically means you're executing a shell script named "install. sh" using the Bash shell.
bash install.sh
We can see that our agent is running successfully :)

1.2) CodeBuild
We had buildspec.yml and index.html files, created earlier in code-Commit.

Now we will create appspec.yml, and scripts file, Look down for the code :)
Step 1: Create appspec.yml file
version: 0.0
os: linux
files:
  - source: /
    destination: var/www/html
hooks:
  AfterInstall:
    - location: scripts/install_nginx.sh
      timeout: 300
      runas: root
  ApplicationStart:
    - location: scripts/install_nginx.sh
      timeout: 300
      runas: root
Step 2: Create install_nginx.sh file
#!/bin/bash

sudo apt-get update
sudo apt-get install -y nginx
Step 3: Create start_nginx.sh file
#!/bin/bash

sudo service nginx start
Step 4: Once all the files are created, let's push it into our repository, so clone the codecommit repository and perform the task as shown.
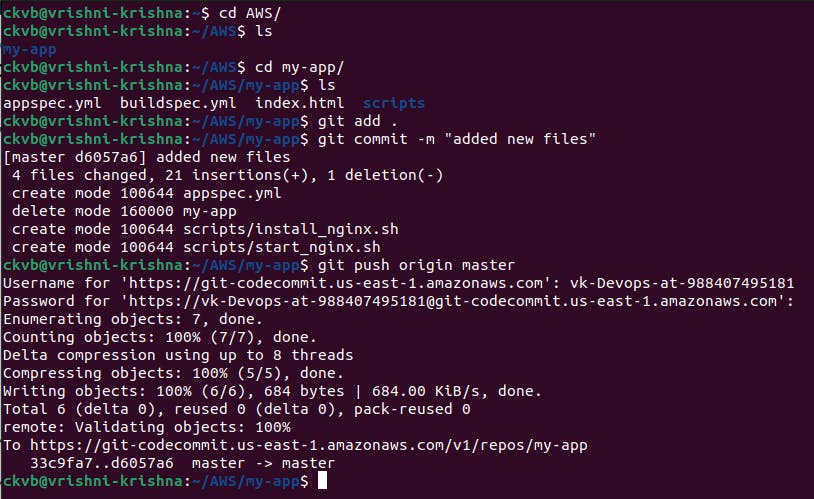
Step 5: Now Refresh your Repository, and look for the newly added files.
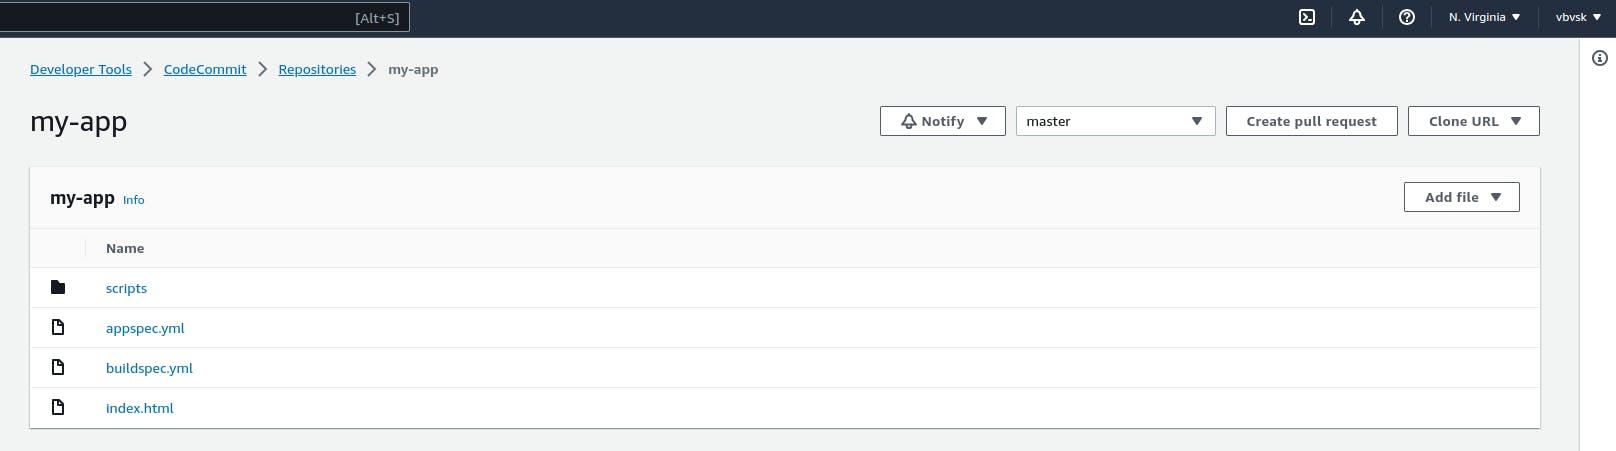
Uffff!!!, Finally done till here.

Step 6: Now CodeBuild it.
Goto CodeBuild-->click Start Build
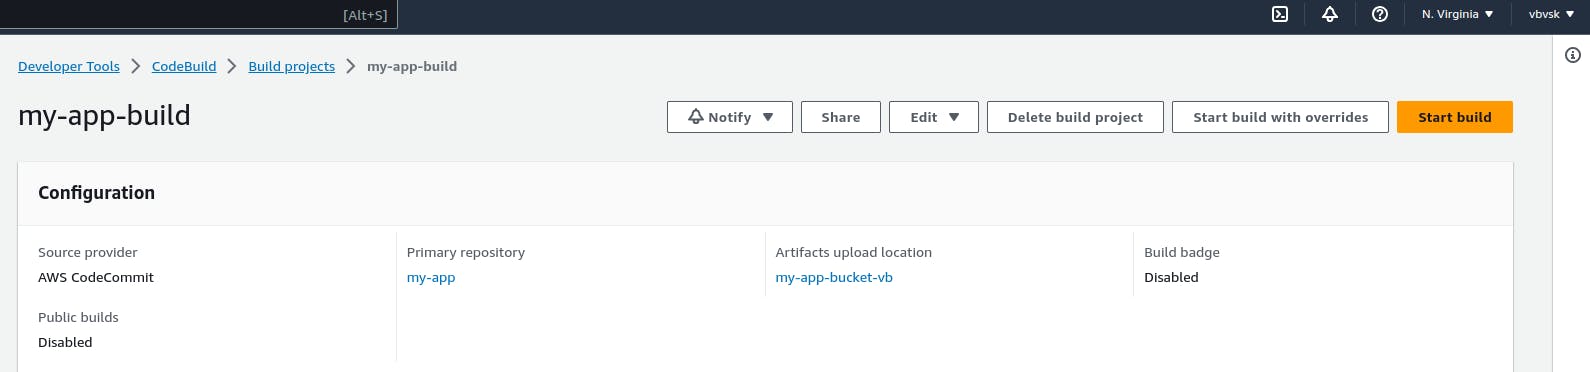
Done!!
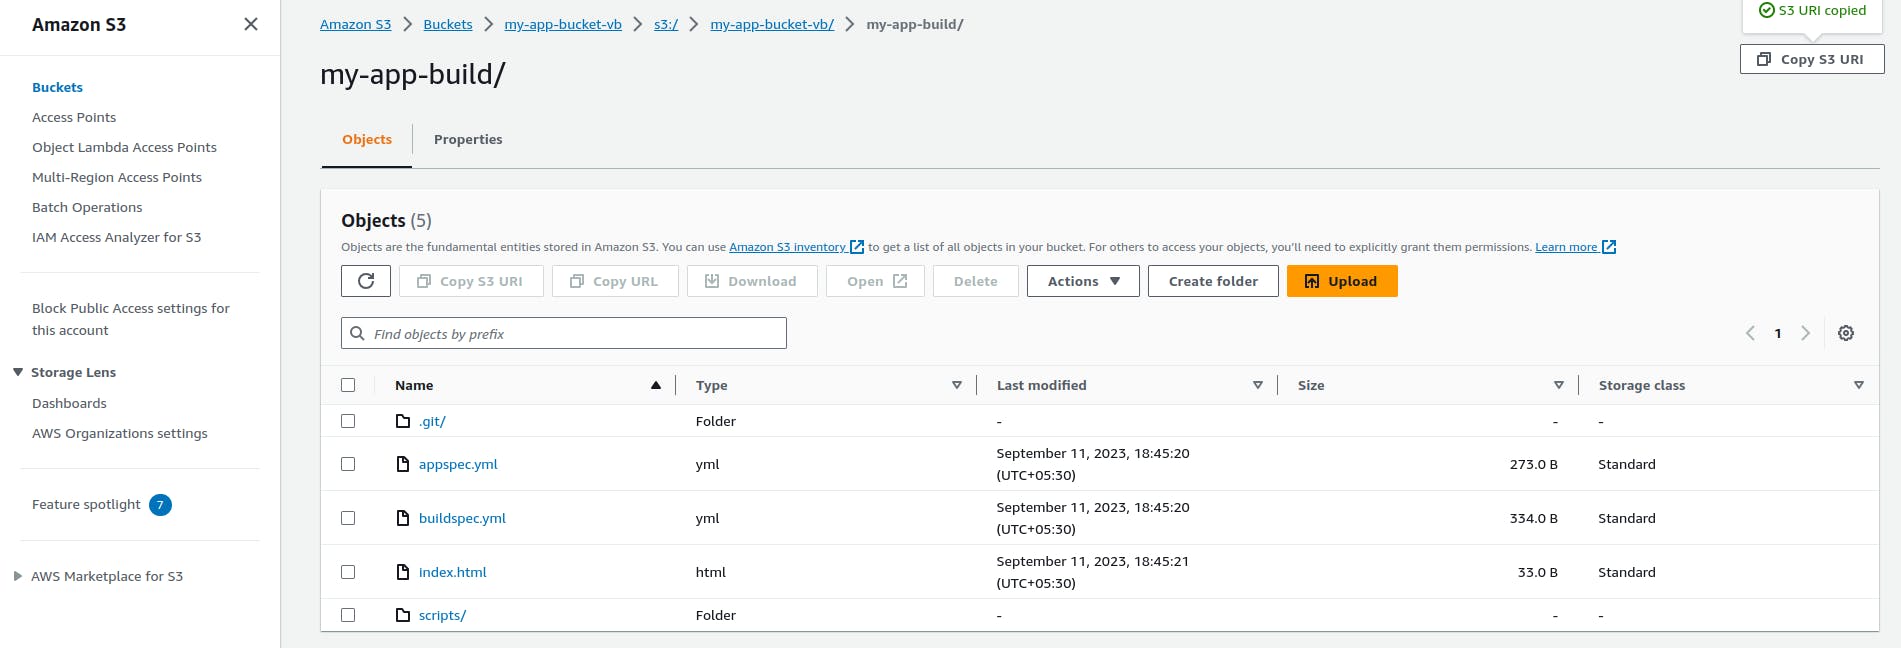
Step 7: After build-->Click on Artifacts upload location
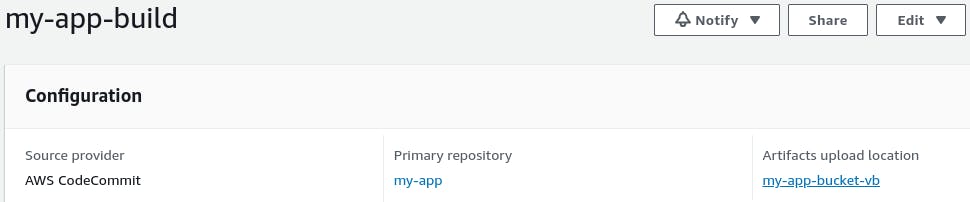
Step 8: Copy the S3 URL, where your build is created(Zoom in and check the path)
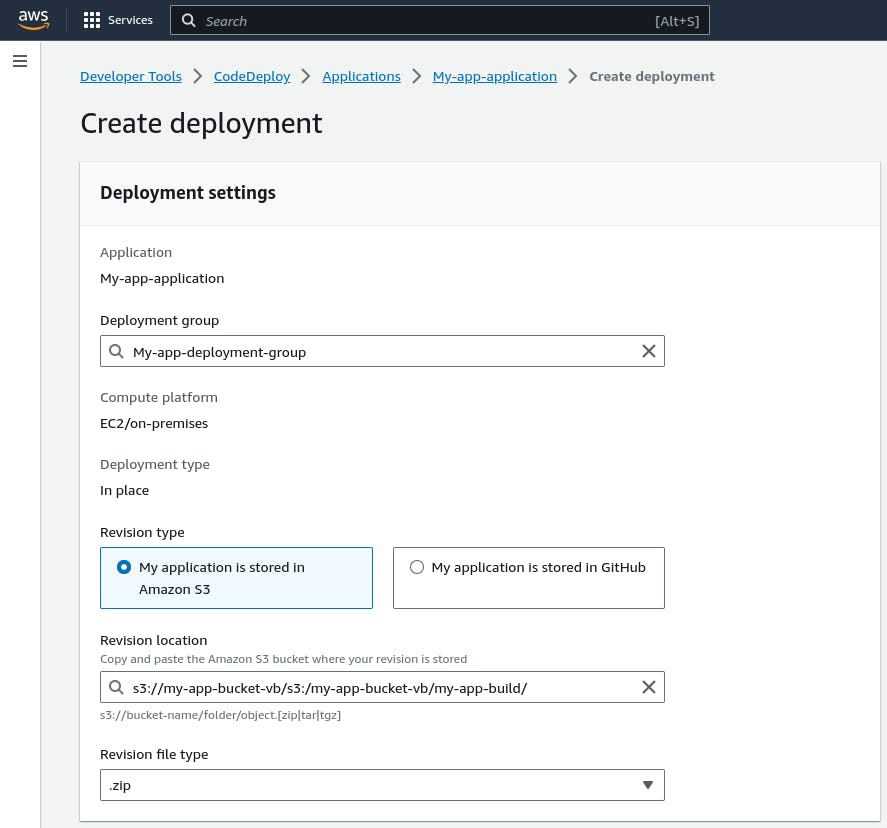
Step 9: After build-->Goto CodeDeploy-->Applications-->ur application name --> Create deployment--> Fill in the required fields as shown-->paste the copied S3 URL in Revision location-->select .zip in Revision file type.
Step 10: Leave the rest of the things as usual and click on create deployment
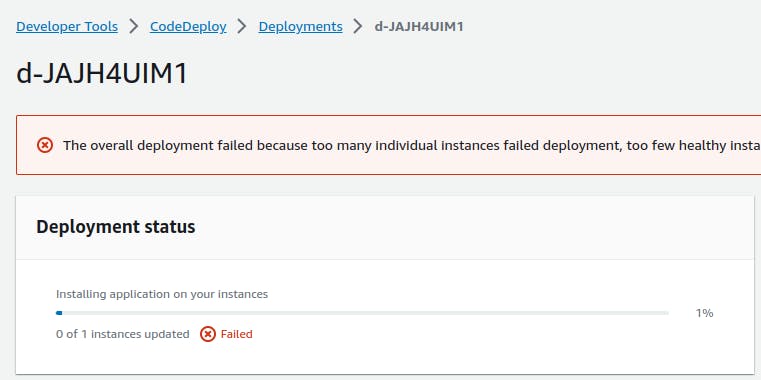
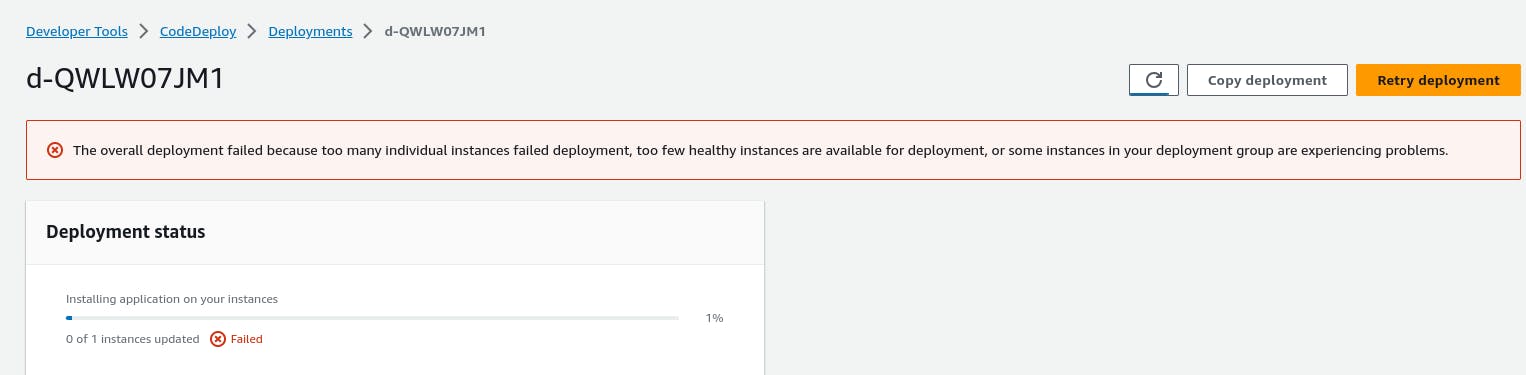
It can't connect, and at last, it will fail to do so :(
To make it successful, create a role with the following permissions
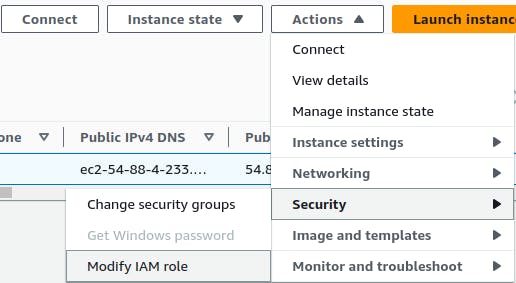
Step 11: Goto your running instance-->Actions-->Security-->Modify IAM Role
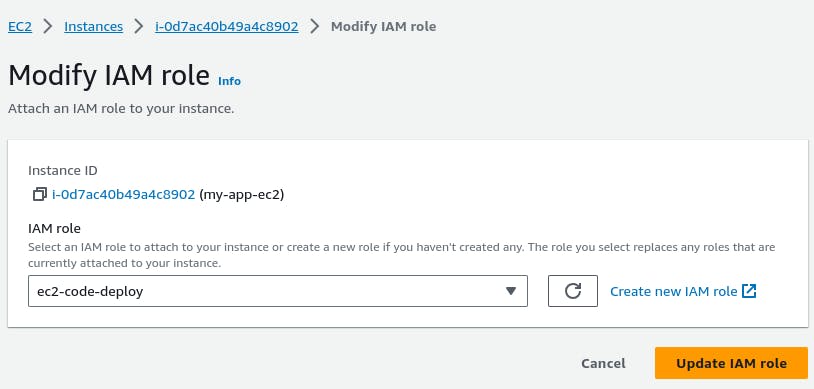
Step 12: Choose a recently created role ec2-code-deploy-->update IAM role
Step 13: Now connect and restart your instance, by using the below command.
sudo service codedeploy-agent restart

Step 14: Now click on Retry Deployment

And finally, it's done🔥🔥🔥
Step 15: Now Copy your Public_IP and check it in the browser

Finally Done With CodeDeploy
Let's start with Code Pipeline

2) CodePipeline
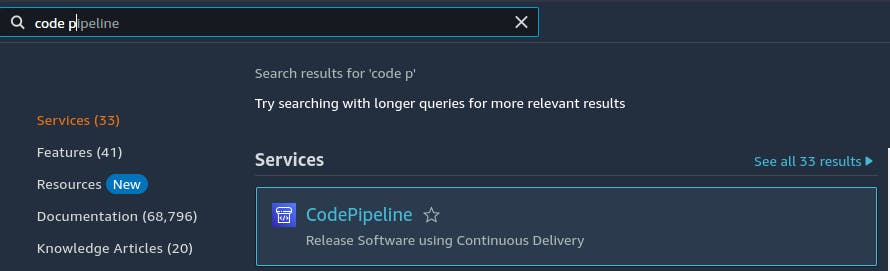
Step 1: Search for Code Pipeline.
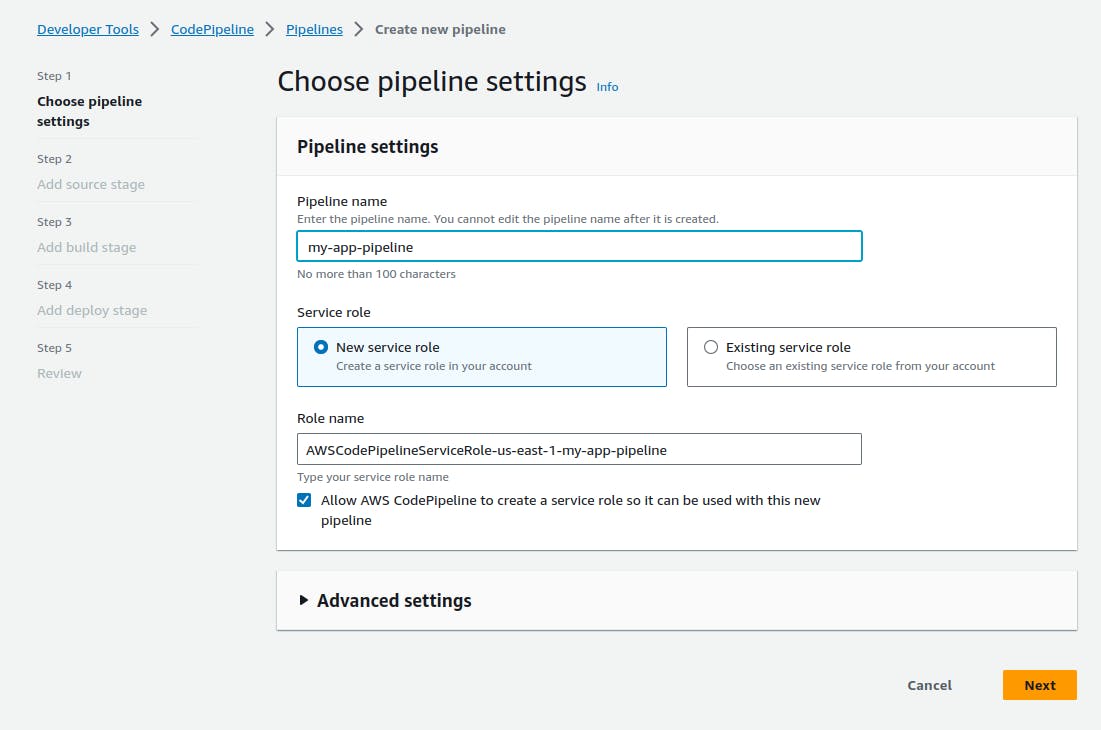
Step 2: Click on Create Pipeline and fill in the fields in Pipeline settings-->click on Next.
Step 3: Fill in the fields in Source Stage-->Click on Next.

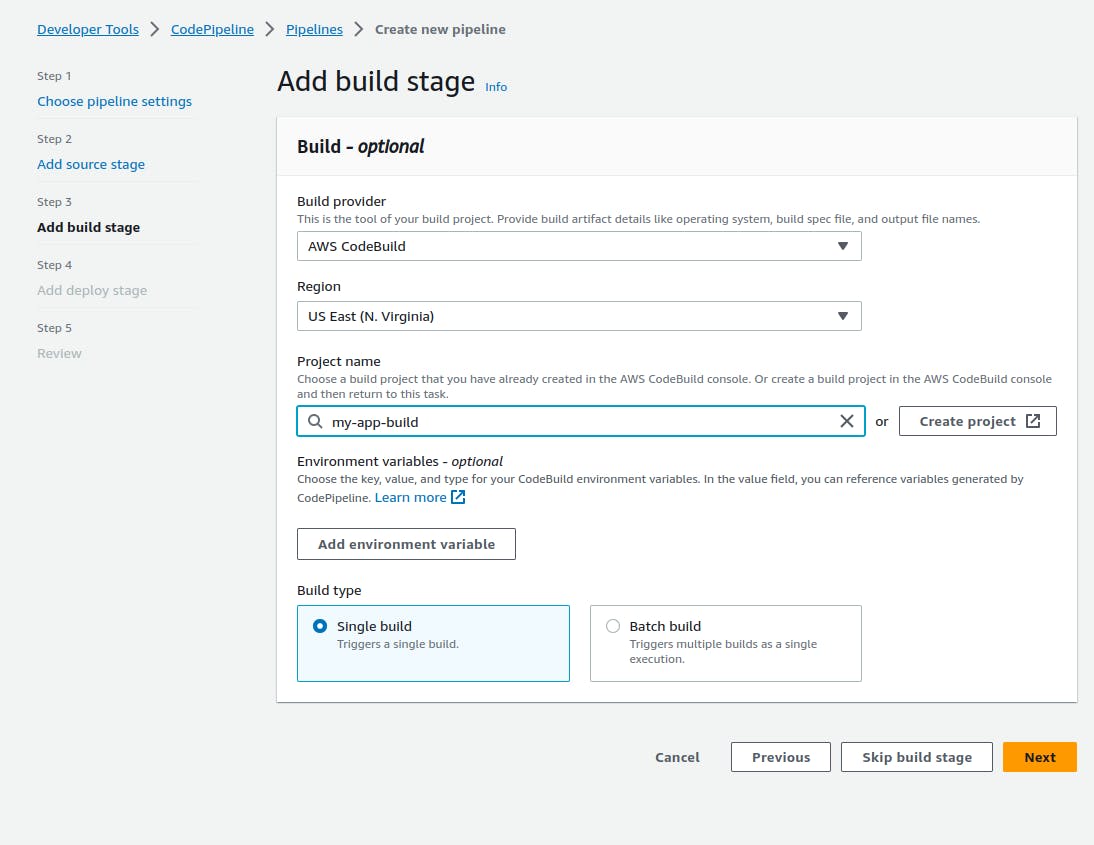
Step 4: Fill in the fields in Build Stage-->Click on Next.
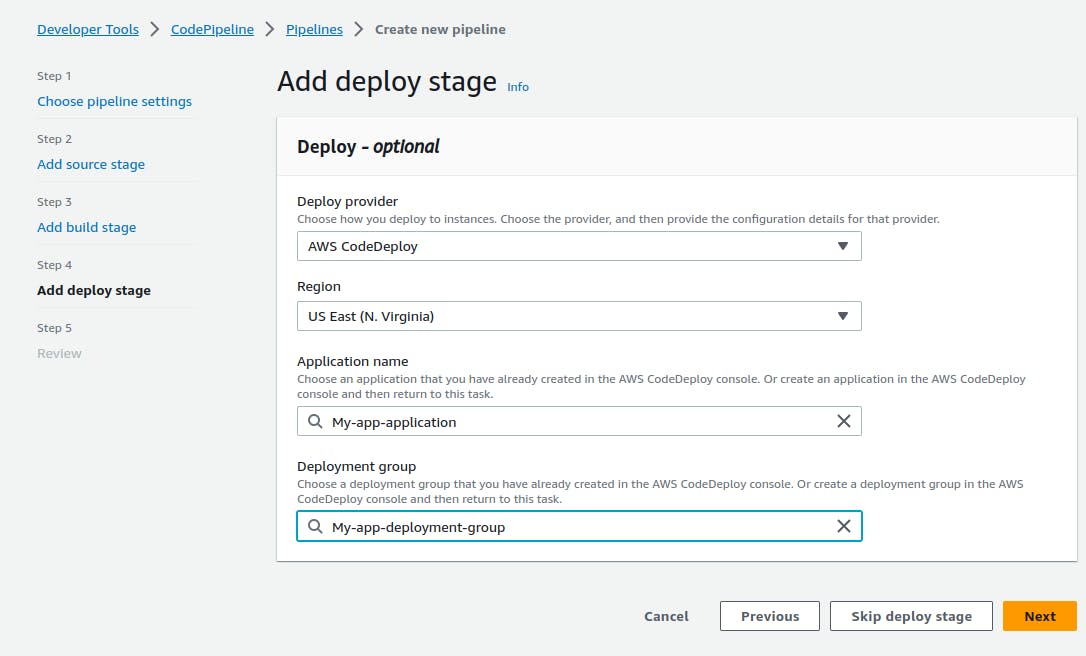
Step 5: Fill in the fields in Deploy Stage-->Click on Next.
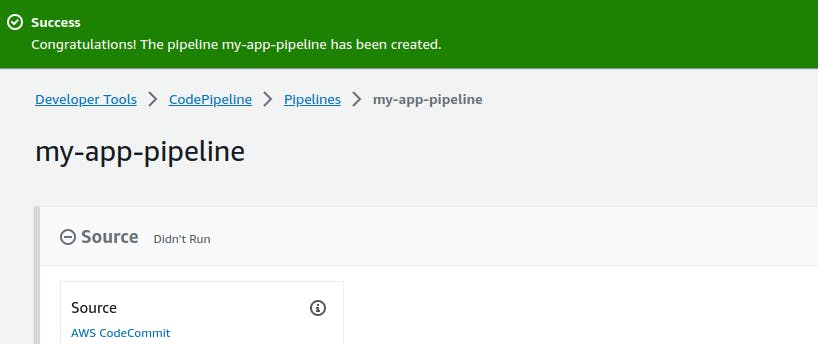
Step 6: After reviewing--> Click on Create Pipeline.
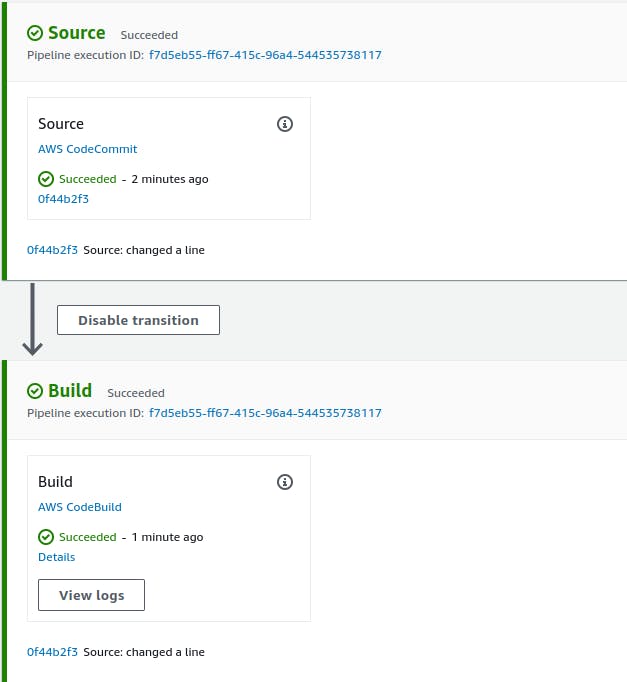
Step 7: We can see succeeded.
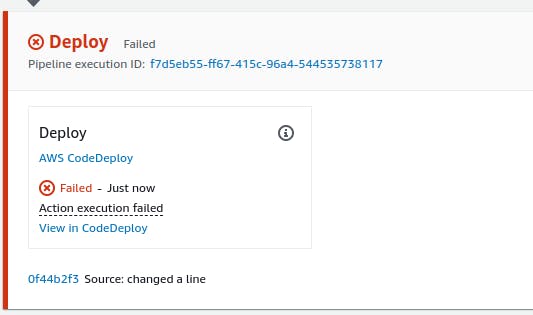
You may see Failure in Code Deploy :(
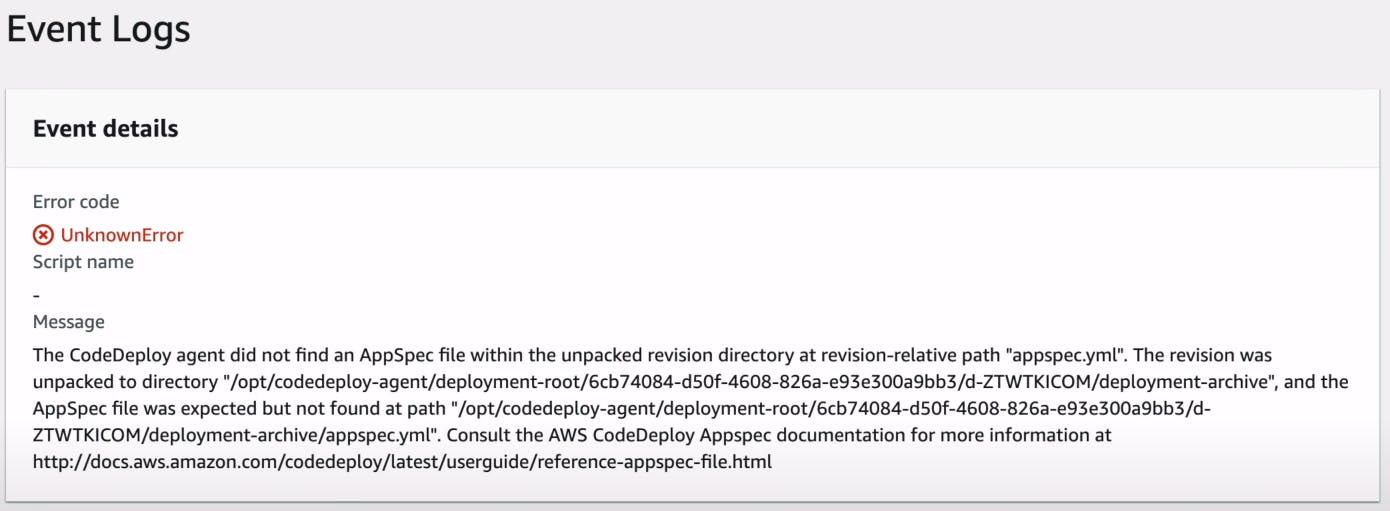
Step 8: Click on View in CodeDeploy--> Scroll down and click on View Events

Step 9: Click on unknown error

And this is the error :(
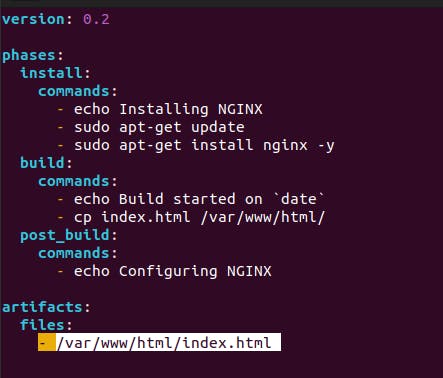
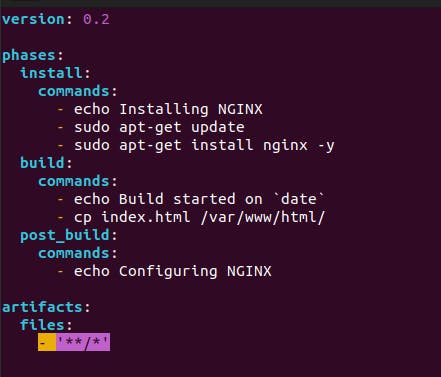
Step 10: Goto buildspec.yml file and edit the artifacts as shown.
Before changes
After changes
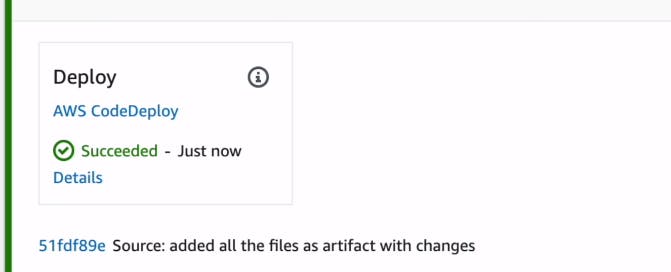
Step 11: Now perform git actions.

Step 12: Now we will get successful deployment.
Step 13: Now copy your public_IP and check in the browser.