DevOps, Day - 78

💻 Python | Docker | Jenkins | Networking | Git | Linux 💻
Passionate about leveraging technology to drive efficiency and deliver innovative solutions. Proficient in Python development, Docker containerization, Jenkins automation, computer networking, Git version control, and Linux administration. Skilled in collaborating with diverse teams to deliver high-quality software products. Proficient in AWS EC2 instance management and deployment.
Seeking new opportunities to apply my expertise and contribute to impactful projects. Let's connect and explore how we can work together!
Inter-personal Skills:
Communication, Adaptability, Emotional intelligence, Active listening, Collaboration.
Happy To Connect🔗😊
Feel free to reach me out😃@ --> vrishnishreevb531@gmail.com 📬

Setting up EC2 Instance Alerts:
Login to AWS Console: Log in to your AWS Management Console.
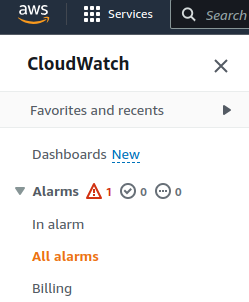
Navigate to CloudWatch: Go to the CloudWatch service by either searching for "CloudWatch" in the AWS Management Console or by clicking on "Services" and selecting "CloudWatch" under "Management & Governance."

Create an Alarm:
In the CloudWatch dashboard, click on "Alarms" in the left navigation pane.
Click the "Create Alarm" button.

Select EC2 Metric:
Choose the "Select metric" button.

Under "Browse for", select "EC2".
Then, choose "Per-Instance Metrics" and select the metric you want to set an alert for, such as CPU utilization.


Set Conditions:
Configure the conditions for your alarm. For example, you can set a threshold for CPU utilization.
You can choose to trigger the alarm when the metric is "Greater" or "Less" than a specific value for a certain period.
You can also specify the period for which the condition must be met for the alarm to trigger.


Set Actions:
Define actions to take when the alarm is triggered. You can choose to send a notification through Amazon SNS (Simple Notification Service) or perform an auto-scaling action, such as launching additional instances.
Click "Create a new topic" to set up an SNS topic and configure email or SMS notifications.

Name and Describe the Alarm:
Give your alarm a name and description to help identify its purpose.

Review and Create:
Review the alarm settings, and if everything looks correct, click "Create alarm."

Created Successfully

Setting up AWS Billing Alerts:
Login to AWS Console: Log in to your AWS Management Console.
Navigate to the Billing Dashboard:
Click on "Services" and select "AWS Cost Management."
In the left navigation pane, select "Budgets."

Create a Budget:
Click on "Budgets"

Click on the "Create a budget" button.

Configure Budget Details:
Provide a name for your budget.
Specify the budget period, such as monthly, quarterly, or annually.
Set the budget amount, which is the amount at which you want to be alerted.
Review and Create:
Review your budget settings and click "Create budget."

Our Budget is created.

Configuration of the EC2 instance alarm has been completed successfully
Edited --> Once it exceeds, it will send a mail similar to this...

Thank you so much for reading
Follow me on LinkedIn to see interesting posts like this : )


