DevOps, Day - 44
Relational Database Service in AWS

💻 Python | Docker | Jenkins | Networking | Git | Linux 💻
Passionate about leveraging technology to drive efficiency and deliver innovative solutions. Proficient in Python development, Docker containerization, Jenkins automation, computer networking, Git version control, and Linux administration. Skilled in collaborating with diverse teams to deliver high-quality software products. Proficient in AWS EC2 instance management and deployment.
Seeking new opportunities to apply my expertise and contribute to impactful projects. Let's connect and explore how we can work together!
Inter-personal Skills:
Communication, Adaptability, Emotional intelligence, Active listening, Collaboration.
Happy To Connect🔗😊
Feel free to reach me out😃@ --> vrishnishreevb531@gmail.com 📬

Step 1: Create a Free Tier RDS instance of MySQL
Log in to your AWS Management Console.
Navigate to the RDS service.
Click on "Services" in the top-left corner.
Under "Database," select "RDS."

Click the "Create database" button.

Choose "Standard Create" to have more control over your RDS instance.

Select the MySQL database engine.

Under "Templates," choose the "Free tier."

Configure your database instance:
Settings:
DB instance identifier: Provide a unique name for your RDS instance.
Master username: Choose a username for your database.
Master password: Choose a strong password for the database.

DB instance size: Select the "Burstable classes" for the Free tier.
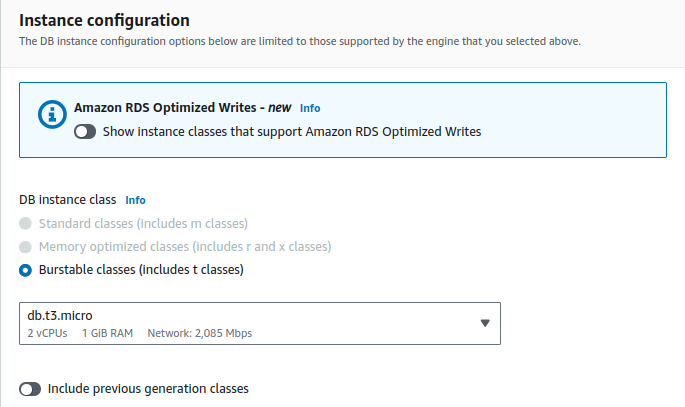
Storage: Keep the default storage settings for the Free tier.

Connectivity:
Launch an EC2 instance
VPC: Select the VPC where your EC2 instance will be running.

Subnet group: Choose a subnet group that includes the subnets where your EC2 instance can connect.

Review your settings and click "Create database."

Wait for your RDS instance to be created. Once it's available, you can proceed to the next task.

Step 2: Use the Existing EC2 Instance, which was created in step 1.
Step 3: Create an IAM Role with RDS Access
Navigate to the IAM service:
Click on "Services" in the top-left corner.
Under "Security, Identity, & Compliance," select "IAM."

In the left-hand menu, choose "Roles."

Click the "Create role" button.

Select the use case for the role:
AWS service: EC2

Attach permissions policies:
In the search box, type "AmazonRDSFullAccess" and select the policy that provides access to RDS.
Proceed to the next step, adding any optional tags or review details.

Give your role a name and description, then create the role.

Our role is created.

Step 4: Assign the Role to the Existing EC2 Instance
While still in the IAM console, select the EC2 instance that you created in Task 1.
In the "Actions" tab, click "Security" --> "Modify IAM role"

Search for the policy you created in Task 3, select it, and attach it to your existing EC2 instance. This will grant your EC2 instance permissions to access the RDS instance.

Step 5: Connect Your Existing EC2 Instance to the RDS Instance
SSH into your existing EC2 instance using the key pair you created when launching the instance in Task 1.

Install a MySQL client on your EC2 instance if it's not already installed.
sudo apt install mysql-clientUse the MySQL client to connect to your RDS instance by providing the RDS endpoint, master username, and password:
mysql -h RDS_ENDPOINT -u MASTER_USERNAME -pFor RDS_ENDPOINT
Goto RDS databases --> Click the database you created.

Down in Connectivity & Security, we can see our RDS_ENDPOINT

Replace RDS_ENDPOINT with the actual endpoint of your RDS instance, and MASTER_USERNAME with the username you specified when creating the RDS instance. You'll be prompted to enter the password.

Thank you so much for reading
Follow me on LinkedIn to see interesting posts like this : )


